How Do I Check Blood Glucose Levels?

Want to learn how to check your own/someone else's blood sugar levels? ...
After some time of thinking what would be interesting to write about for my blog audience, I decided to ask my friends what they would be interested in reading about next. Their answers mostly focused on the thought that it was important to know how to check blood glucose levels with a glucometer, especially in case of any emergency. After thinking about it, I agreed, it is extremely essential. Not only is it vital for people to know how to check someone’s blood glucose levels, but it is even more critical because diabetics may suffer from unnexpected low blood sugars or hypoglycemias and loose consciousness without being able to check their blood sugar first. Therefore, I have decided to provide a step-by-step guide on how to use the OneTouch Ultra Mini glucometer, as it is the one I use on a daily basis. This blog post provides crucial information that should be taken into consideration and remembered in case of an emergency.
As I have mentioned in my previous blog posts, I tend to check my blood glucose before eating and whenever I feel sick with either a high or low blood sugar level on a daily basis (approx. 10 times a day). Sometimes, diabetics may skip checking their blood sugar because “they feel okay”. However, this is a mistake many diabetics often commit, as sometimes we are unable to easily recognize low or high blood sugar levels.
The images shown below will demonstrate each step that needs to be taken when checking someone’s blood glucose. I have also provided some writing with each image so that the images are easier to understand.
Let’s learn!

When checking someone’s (or your own) blood glucose levels, the first thing you need to have is a glucometer. Mine looks like the one displayed in the photo below. It is required for you to have a lancet pen (in which you will be inserting a lancet), lancets, test strips, and a meter monitor (in which you will be inserting test strips when using).
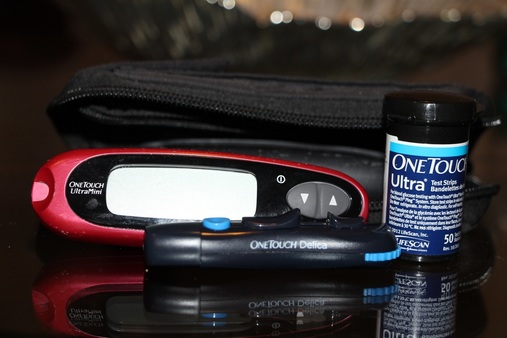
This is my One Touch Ultra Mini glucometer from LifeScan, Inc.

In order to fully understand how a glucometer works, these are the functions of each supply:
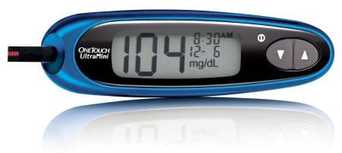
1. Blood glucose monitoring meter - Reads blood glucose level. Ideal result falls between 4.0 mmol/L and 8.0 mmol/L
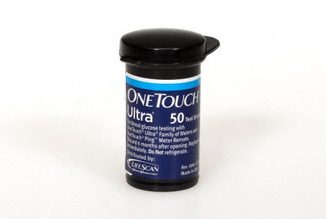
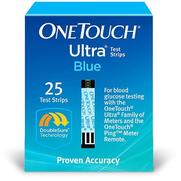
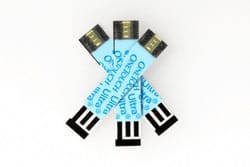
2. Test strips - Collects the blood sample
|
|
|
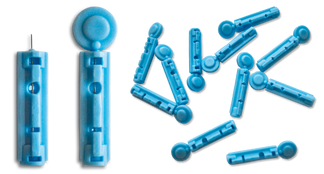
3. Lancets - Fits into lancet pen to prick finger to provide the small drop of blood that is needed from whoever you’d like to get blood glucose results for
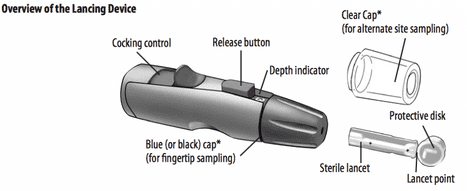
4. Lancing Pen - Pricks finger when button is pressed. One can determine how deep the needle goes into the skin which is different for every individual - the higher the number the deeper the lancet goes into the skin
|

I hope this can help you understand the various parts of a glucometer. Now, these are the steps to follow when attempting to check someone’s blood sugar, or even your own! Always use a different lancet, no matter what.
1. Wash your hands so the sample of blood is clean.
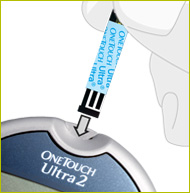
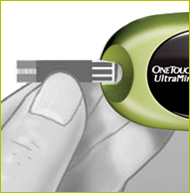
2. Put test strip into glucometer, as illustrated in the images below (try to avoid touching the strip where the sample will be tested).
2. Put test strip into glucometer, as illustrated in the images below (try to avoid touching the strip where the sample will be tested).
|
|
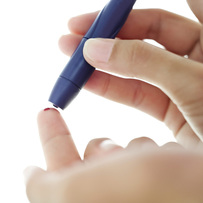
3. Prick the person’s finger (or your own finger) with the lancing pen, according to the deepness that is required.
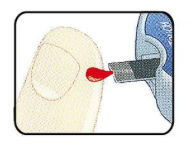
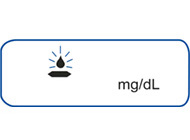
4. Put a small drop of blood on the test strip. The glucometer must have a “blood drop” symbol on the screen before attempting.
|
|
5. Screen will count down 3 - 2 - 1 and your result will show up.
Remember, a regular blood glucose level should fall between 70 and 130 mg/dl OR 4.0 to 8.0 mmol/L, depending on what unit of measurement the glucometer is set on. Therefore, if the blood glucose level is lower than 70 mg/dl OR lower than 4.0 mmol/L., the person has a low blood glucose, and thus, needs to consume sugar as soon as possible (juice, glucose tablets, candy, etc.).
6. Make sure to disinfect your finger afterwards.
I hope this post helps you to clearly understand the process of checking blood glucose levels with an at-home glucometer. It is extremely important to know this process if you know someone with either type of diabetes.
You could save someone's life!

Thank you for taking the time to read this post, as it is very important for people to know these steps. I hope it has helped you in some way!
See you next week!
